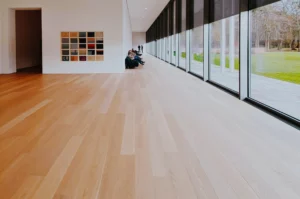
Installing a hardwood floor can be a daunting task, but anyone can do it with the right tools and instructions.
Many people are intimidated by the prospect of installing a hardwood floor, but it doesn’t have to be complicated. With the right tools and instructions, you can do it yourself in no time.
This article will discuss installing a solid hardwood floor in a beginner-friendly way. We will provide you with all the information you need to get started, including the tools you need and the steps you need to take. We will also share some tips and tricks from our experts to make the process easier.
Why Install a Hardwood Floor?
A hardwood floor is a beautiful addition to any home. It adds value to your property and can last for decades with proper care.
Hardwood floors are easy to clean and maintain, and they resist dents and scratches better than other types of flooring.
There are many other reasons to install a hardwood floor in your home. Here are just a few:
- Hardwood floors are durable and can last for decades with proper care
- It is easy to clean and maintain a hardwood floor
- They are hypoallergenic and ideal for people with allergies or asthma
- They are available in a wide variety of colours and styles to match any décor
- Hardwood floors can be refinished multiple times, unlike other types of floors.
What You Need to Install a Hardwood Floor:
- A power drill
- A saw (if you’re not using prefinished hardwood planks)
- Measuring tape
- A hammer
- Nails or screws (depending on the type of flooring you’re using)
- A level
How to Install Solid Hardwood Floor – Step by Step Instructions
STEP 1: The first step is to measure the area where you install the hardwood floor. It is essential to have an accurate measurement to know how much material you need. Once you have the sizes, you can purchase the hardwood planks or boards.
STEP 2: If you’re using unfinished hardwood planks, the next step is to cut them to size. You will need to use a saw for this. If you’re using prefinished hardwood boards, you can skip this step.
STEP 3: The third step is to install a subfloor. This is optional, but it will make the installation process much more manageable. If you’re not using a subfloor, you can skip this step.
STEP 4: The fourth step is to install the hardwood flooring. This can be done by either nailing or screwing the boards into place. Once all of the panels are in place, you can trim them to size.
STEP 5: The fifth and final step is to install any mouldings or trim. This includes baseboards, quarter round, or shoe moulding. These can be nailed or screwed into place.
Now that you know how to install a hardwood floor, it’s time to get started. Follow these steps, and you’ll have a new hardwood floor in no time.
Hardwood Floor Installation – Tips & Tricks
- When measuring solid hardwood flooring, add 10% to account for waste.
- If you’re using prefinished hardwood boards, check the manufacturer’s instructions for installation.
- If you’re not using a subfloor, install the hardwood flooring on a level surface.
- When trimming the boards to size, use a sharp utility knife.
- When installing mouldings and trim, use a nail gun for the best results.
Final thoughts
Hardwood floor installation is a relatively straightforward process that anyone can do. With the right tools and instructions, you can have a new hardwood floor in no time. Be sure to follow the manufacturer’s instructions for the best results.
We hope you enjoyed this article on how to install a hardwood floor. If you have any questions or comments, please feel free to leave them below. We would love to hear from you!
Thanks for reading!


